 admin
admin How to Replace a Hitch Receiver: A Step-by-Step DIY Guide
How to Replace a Hitch Receiver
Replacing a hitch receiver might not prove as strenuous, as it might sound, especially to do-it-yourselfers and individuals that have a hands-on personality, as well as trailer owners that tow trailers, campers, and/or bike racks. That is knowing. How to Replace a Hitch Receiver That your towing setup is safe, secure, and able to perform. When acquiring a new receiver or doing repairs on your existing damaged receiver or your already corroding receiver, the manual will help you along the entire process with full clarity and assurance. The article is practical so that you can learn not only to do this work right the first time in real life.
What reason is there to substitute a hitch receiver?
Before entering How to Replace a Hitch Receiver, we must have our heads around why we ought to make such a step. Hitch receivers can become worn due to rust or road salt, and also they can wear out due to some impact. This is much harsher to the receiver of very different cars, especially trucks and SUVs that may be used to tow or go off-road and may end up cutting their durability. The physical manifestations of nearing upgrade time are physical cracks, rust, or loose mounts. In case your towing demands expanded, the typical cause would be the improvement to the larger duty hitch.
The Things You Will Require Before Starting
Training results in the successful hitch receiver substitution. Making the decision how to do it and not with a great deal of bother, to do everything in anticipation, to get all the tools ready. The following are some of the requirements:
The recently acquired receiver hitch that has been identified to handle the towing weight of your vehicle or truck
- Set of socket wrenches
- Breaker mover oil (e.g., WD-40)
- Jack stands and a jack
- Torque wrench
- Gloves and safety glasses
The right gear will make the job less laborious but also less hazardous. The uniqueness of quality work and compatibility in services will provide sustainability.
Take care of your car, step 1.
Before you get down to the nitty-gritty of How to Replace a Hitch Receiver Park your car in a level position. Parking brakes and wheel chocks can be helpful in security. To verify it, raise the rear end of an automobile using the jack and supporting it using the jack supports. Under a vehicle that is not supported, do not work. The cost cannot be that of safety.
Step 2: Apply penetrating oil to bolts.
One of the most frequent obstacles on the learning path is dealing with rusted or stuck bolts. How to Replace a Hitch Receiver. Apply penetrating oil on all the mounting bolts liberally and let this soak for 10-15 minutes. This separates corrosion and washes it away with such ease.
Step 3: The Old Hitch Receiver Disappearing Step 3: The Old Hitch Receiver to Cede
The time now is to remove the old receiver. Continue working on removing all the mounting bolts with the correct size of the socket. When you need to loosen frozen bolts, you may need that much torque. If your vehicle possesses a factory-welded hitch, How to Replace a Hitch Receiver This is an even more complex task that requires cutting tools and, in addition, welding, and it is highly recommended that this job be done by a professional. It is normally a bolt-off process, though. The old hitch receiver can be pulled from underneath the frame when the bolts are loosened up.
Step 4: Inspection of Installation Area Mounting
A substantial part of how to replace a hitch receiver safely is a check on whether the area of the frame is intact; check on whether the area is gratitude-free. Remove rust or any junk with a wire brush. Check the frame for cracks or weak spots, especially the bolt holes. When destroyed, a new hitch receiver must not be fixed without a professional checkup to prove good health or repair.
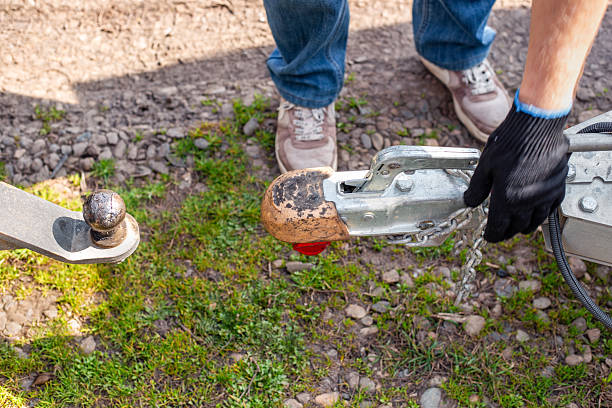
Step 5: Find a New Hitch Receiver
Slide the new automobile hitch receiver below the car. This may be helped accordingly regarding the weight and makeup of the hitch. For matching the holes on the mountings, start screwing in the bolts by hand to fit well. Using a torque wrench, tighten the bolts to the manufacturer’s specifications. Not under-tightening or over-torqueing those bolts could be one of the most valuable things to do in How to Replace a Hitch Receiver because the former, as well as the latter, can inhibit the safety of towing.
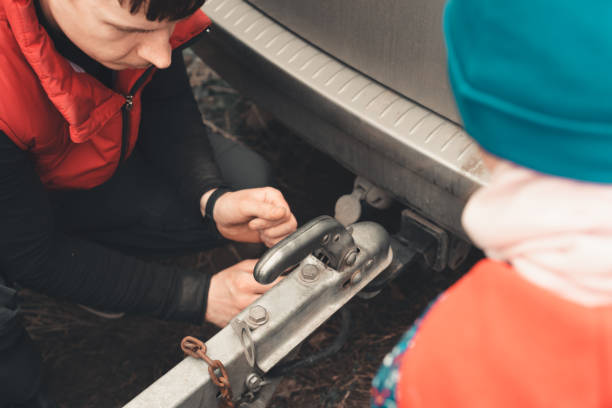
Step 6: Fit/Stability Test
Once the bolting is fixed, check to find out whether there is any movement or deviation. Try to insert your hitch accessories, like a ball mount or cargo carrier, so that they can slip in and fit in. The fit is not the sole manner of examining your work; check it around the functions. Ensure your torque settings—and ensure it is done correctly.
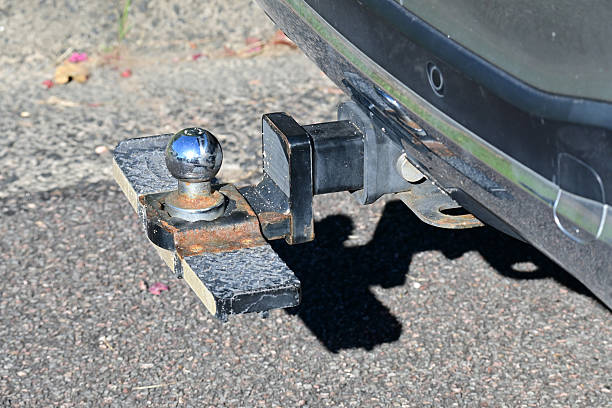
Step 7: Discount Vehicle and Final Inspection
After making sure that everything has subsided, lower the car (as it may have been elevated). Inspect by a walk-around check. Look beneath the rear end in order to ensure that the hitch receiver lies against the frame and no gaps are observed. Awareness How to Replace a Hitch Receiver is not equivalent to upgrading hardware; it is the task at hand with the assurance that your car is capable of facing the road.
Safety Factors That You Cannot Neglect
Just as you think about how to replace a hitch receiver, do not cut on safety. Always wear safety equipment and jack stands, and use torque specifications. Just to be sure, compare the owner’s manual of your car, or refer to your qualified mechanic about something you are not so sure about. Hitch can seriously toughen up failure towing; thus, it is not a joke doing this kind of work.
At what time should one seek professional help?
Owners do not necessarily feel confident about their activity about the vehicle repair. It just might be a specialized installation. Your car may have a specialized installation, or you may have frame damage or welding of the receiver in place; then you might want to get a certified tech. A professional can do it quickly, and all precautions on security will be applied. Knowing how to replace a hitch receiver also entails knowing when to accrue based on the virtue of safety and the virtue of efficiency, which comes on the basis that they have to be delegated.
Pro Tips for a Lifetime Hitch Receiver
Once you have your new hitch on, you can make it last longer just by making it rustproof by painting it with rustproof paint and cleaning and covering it with protective covers when not in use. Towing regularly? Ensure that you check the receiver after every month. Finding out how to replace a hitch receiver is also getting on its second care.
Conclusion
Between these achievable steps, substituting a hitch receiver is surely not the largest job to attack on a weekend, even by a person of moderate competence. Not only can you collect money through the correct steps, but you can also learn how your vehicle’s towing parts are. Most importantly, education will enable you to have power in your own hands-on how you can make your car realistic and functional. Check out this guide when you require it and do not hesitate to post your experience with other DIYers who are interested to know how to go ahead with such upgrades.
FAQs
What will I know when my hitch receiver needs replacement?
When you see excessive rust, cracks, or loose mounting points, then it is time to change it. Salt, along with recurrent towing, may allow rapid corrosion, and therefore close observation is required.
Can I do the upgrade of a higher-rated hitch receiver?
Yes, but your hitch must match the frame of your vehicle, including the bolt pattern. Confirming the tow rating is also a habit to be followed, and all the torque specs should be sought during the installation.
0 Comment